
Master the Art of Designing Floor Plans with Color Coding: A Comprehensive Guide
In the world of architecture and interior design, creating floor plans is more than just drawing walls and rooms. Floor plans with color coding elevate the clarity, functionality, and aesthetics of your designs. Whether you are a beginner learning architectural concepts or an interior designer aiming for precise client communication, understanding color-coded floor plans can transform your workflow. In this guide, we will explore practical steps, techniques, and tools to learn to create floor plans with color coding efficiently.
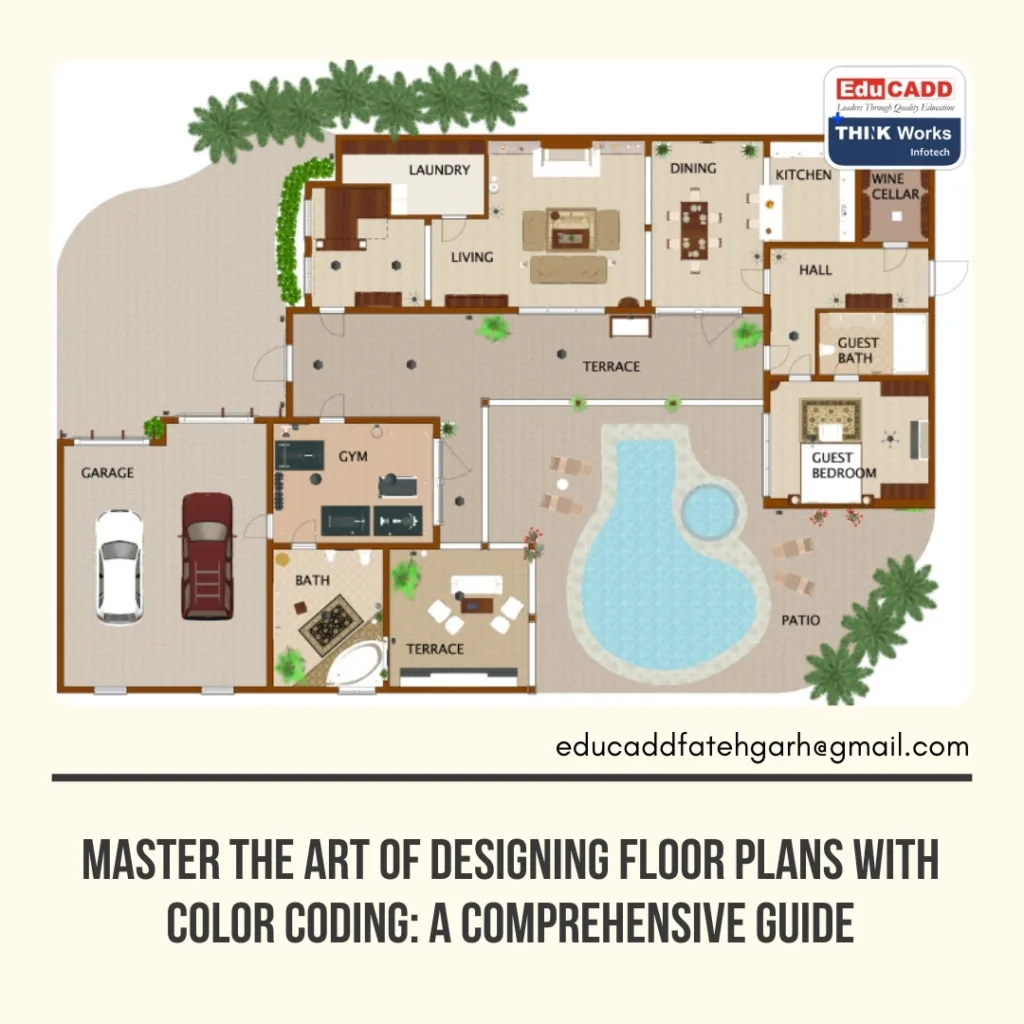
Why Color Coding Matters in Floor Plans
Color coding in floor plans is not just an artistic choice—it is a functional necessity. By applying specific colors to different elements, such as walls, furniture, plumbing, or electrical layouts, you improve readability. Moreover, color coding helps in quickly identifying structural elements, zones, and functional spaces.
For example, using blue for water lines, red for electrical conduits, and green for living spaces immediately communicates essential information. Learning to create floor plans with color coding ensures that both clients and contractors understand the design without confusion.
Additionally, color coding saves time during the review process. When collaborating with teams, everyone can refer to a specific color to discuss modifications. Consequently, errors reduce, and project efficiency increases.
Essential Tools and Software for Color-Coded Floor Plans
To effectively learn to create floor plans with color coding, you need the right tools. Traditional methods like sketching on paper are still useful, but software solutions provide precision and flexibility.
- AutoCAD – Ideal for detailed architectural designs. AutoCAD allows color layers for walls, furniture, and electrical systems.
- SketchUp – Perfect for 3D modeling with intuitive color application.
- Revit – Offers Building Information Modeling (BIM) with customizable color-coded layers.
- RoomSketcher – User-friendly for beginners, suitable for interior planning with simple color-coded visuals.
- Adobe Illustrator – Helpful for presenting polished and visually appealing color-coded plans.
Each tool provides unique advantages, but the key is consistency. When you learn to create floor plans with color coding, always follow a color scheme that aligns with industry standards. For instance, structural walls might always be dark gray, furniture in brown or beige, and utilities in blue and red.
Moreover, using digital tools allows you to experiment with different colors without starting from scratch. This flexibility helps in refining your floor plan designs efficiently.
Step-by-Step Process to Create Color-Coded Floor Plans
Creating effective color-coded floor plans involves several systematic steps. Following these steps ensures accuracy and professional output.
Step 1: Understand the Project Requirements
Before picking colors or drawing layouts, analyze the project needs. Ask questions like:
- What type of space am I designing?
- Which utilities need highlighting?
- Who is the audience—clients, contractors, or students?
This preliminary understanding guides your color choices and drawing approach.
Step 2: Create a Base Floor Plan
Start with a basic floor plan layout. Draw walls, doors, windows, and essential furniture without worrying about colors yet. Accuracy is critical because all color coding will depend on this base plan.
Step 3: Define Your Color Scheme
Select colors for each element based on visibility and standard practices:
- Walls – Gray or black
- Living areas – Light yellow or beige
- Kitchen & bathroom – Blue or turquoise
- Electrical systems – Red
- Plumbing – Blue or green
Consistency is key here. Avoid using too many colors, which can confuse viewers. Stick to a palette of 6-8 colors to maintain clarity.
Step 4: Apply Colors to the Floor Plan
Using your chosen software or drawing tools, fill elements with the respective colors. Make sure layers are labeled correctly to make editing easier. Proper layering ensures you can toggle visibility for presentations or construction use.
Step 5: Review and Refine
Once colors are applied, review the floor plan for readability. Ensure each color distinctly represents its assigned element. Conduct a final check with peers or mentors to receive feedback. Adjust as necessary to improve clarity and aesthetics.
By systematically following these steps, you will learn to create floor plans with color coding that are professional, clear, and visually engaging.
Practical Tips for Beginners
Beginners often struggle with balancing creativity and functionality in color-coded floor plans. Here are some practical tips:
- Start Simple – Begin with a small project to practice color selection and layering techniques.
- Use Industry Standards – Familiarize yourself with standard architectural color codes to maintain professional quality.
- Keep Layers Organized – Name layers clearly to avoid confusion when editing.
- Limit Colors – Overusing colors reduces readability. Stick to essential elements for clarity.
- Seek Feedback – Show your designs to instructors, peers, or clients to ensure your color coding communicates effectively.
Additionally, practice is crucial. The more floor plans you create, the easier it becomes to select appropriate colors and improve visual communication.
Advantages of Color-Coded Floor Plans in Real Projects
Integrating color coding into floor plans offers multiple benefits. Firstly, it enhances communication. Clients who may not understand technical blueprints can instantly interpret the design. Secondly, it improves collaboration. Engineers, architects, and contractors can discuss changes efficiently using a shared color reference.
Color coding also improves error detection. Misplaced utilities or design inconsistencies become apparent when colors are distinct. Moreover, in presentations, a color-coded plan is more engaging than a monochrome sketch. It not only conveys the design but also adds a professional touch.
Finally, learning to create floor plans with color coding builds your professional skills. Employers and clients appreciate designers who can combine technical precision with clear visual communication. Mastering this technique increases employability and project efficiency.
Advanced Techniques for Color-Coded Floor Plans
Once you are comfortable with basics, you can explore advanced techniques to make your floor plans even more effective.
- Gradient Coding – Use gradients to represent intensity or usage, such as high traffic zones in darker shades.
- Patterned Color Fill – Apply patterns along with colors to distinguish similar elements. For instance, hatching for walls and solid fill for furniture.
- Interactive Floor Plans – Use software like AutoCAD or Revit to create clickable, color-coded plans for digital presentations.
- Layer-Based Customization – Customize visibility of layers to present specific aspects of the plan without clutter.
- Annotation with Color Codes – Add legends and notes to explain what each color represents. This improves understanding for all viewers.
Incorporating these techniques ensures that your designs are not only visually appealing but also highly functional for professional projects.
Conclusion: Transform Your Floor Plan Skills Today
Mastering color-coded floor plans is an essential skill for architects, interior designers, and hobbyists alike. By understanding color schemes, using the right software, and following systematic steps, anyone can create professional, visually clear, and functional floor plans.
Starting with simple projects, experimenting with color combinations, and gradually exploring advanced techniques will solidify your expertise. Remember, color coding is more than decoration—it’s a communication tool that bridges the gap between technical drawings and real-world understanding.
Invest time in learning these methods. Soon, you will confidently present floor plans that are accurate, visually appealing, and easy to comprehend. Learn to create floor plans with color coding, and elevate your design projects to the next professional level.

